Hubble Multimedia
Hubble on the NASA App
NASA's free mobile application puts Hubble interactives, resources, and information at your fingertips, including an augmented reality model exclusive to the NASA app. Use this app to stay up to date on all things Hubble!
Hubble Augmented Reality (AR) 3D Model
Did you know that the NASA app has an AR feature? By using the app on your mobile device, you can make a small virtual model of the Hubble Space Telescope appear on your screen in whatever direction your camera is pointing ― on a shelf, on your desk, even in your classroom! Follow the steps below to try it yourself:
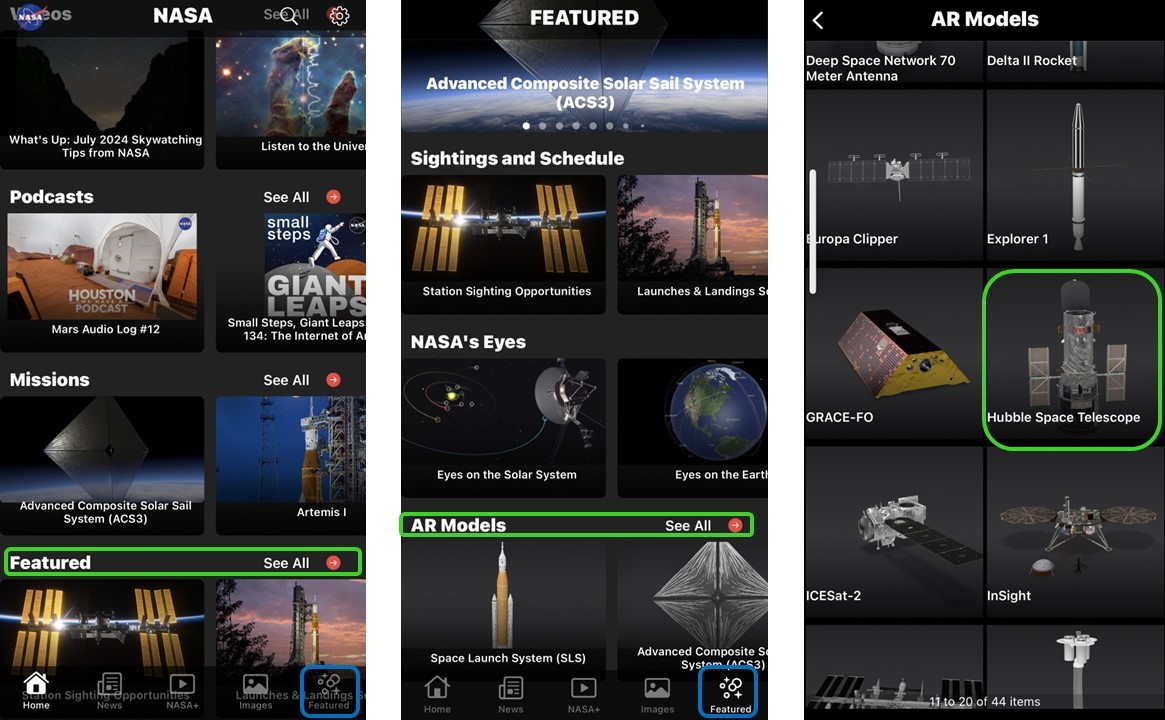
- Step 1: Open the NASA App to arrive on the home page. You can either scroll down to the Featured heading and hit the "See All" arrow, or click on the "Featured" button at the bottom of the app (next to "Images").
- Step 2: In the Featured section, scroll down to the AR Models heading and click the "See All" arrow. (You can also scroll to the right under AR Models to find the model you're looking for.)
- Step 3: Scroll down to the "Hubble Space Telescope" model, and click on it.
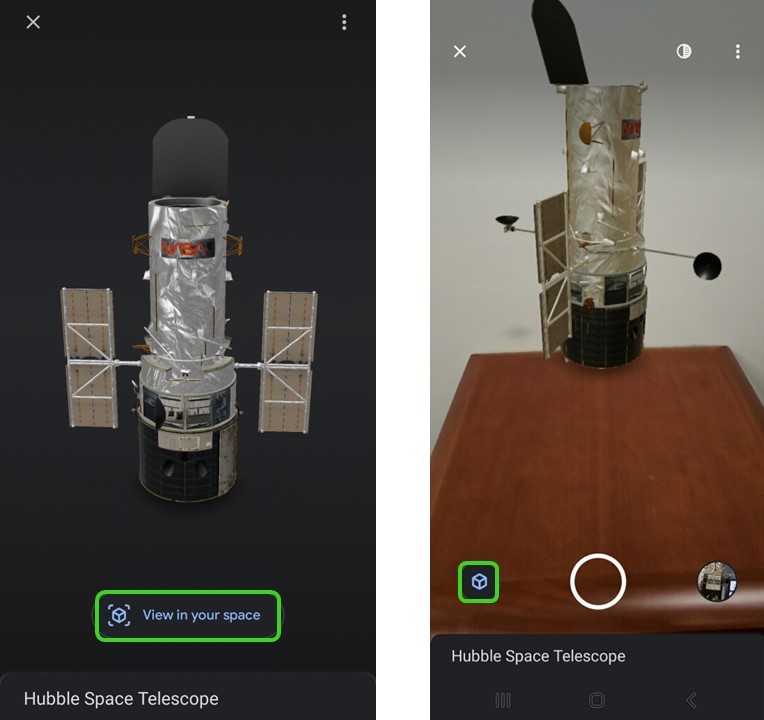
- Extra Step for Android Users: While the iOS version of the app will launch straight into the AR Mode, the Android version launches into Object Mode by default, where you can view the model of Hubble at a 360° angle against a gray background. To switch to AR Mode, press "View in your space" near the bottom of the screen. You can switch back to Object Mode at any time by pressing the cube symbol button in the lower-left corner of the screen.
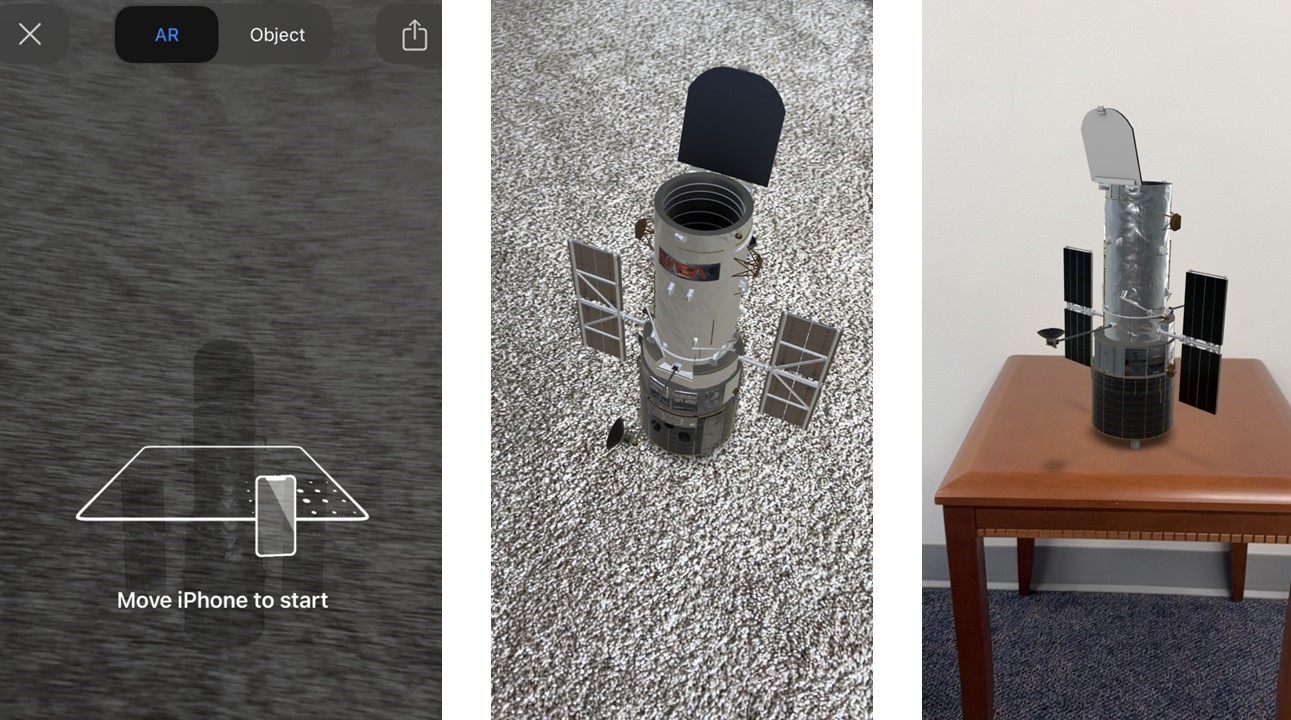
- Step 4: Move your phone camera as directed by the instructions on the screen over the area where you would like to project the model. Try to choose a flat space free of clutter, such as a desk or the floor.
- Step 5: Once the app has scanned this area, the Hubble model will appear on your phone screen in this space. By using two fingers to make the "zoom-in"/"zoom-out" pinching motions on your screen, you can make the model larger or smaller; you can also rotate the model 360° to see it from different angles.
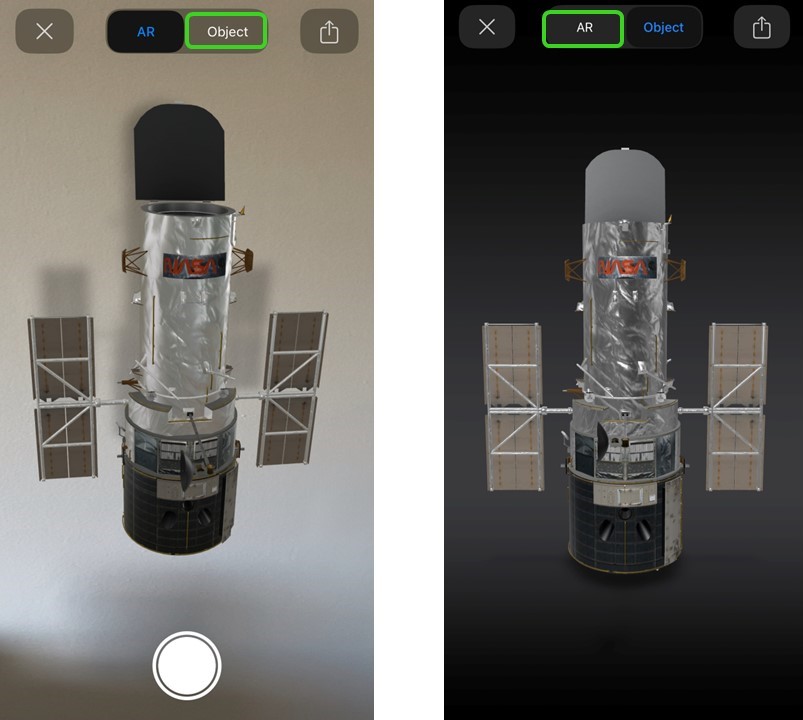
- For iOS Users: To see the Hubble model in "Object" Mode, where it's set against a gray background and not projected onto your environment (this is the initial mode for Android devices, as detailed above), click on "Object" button on the right at the top of the screen. You can switch back to AR Mode at any time by pressing the "AR" button on the left.
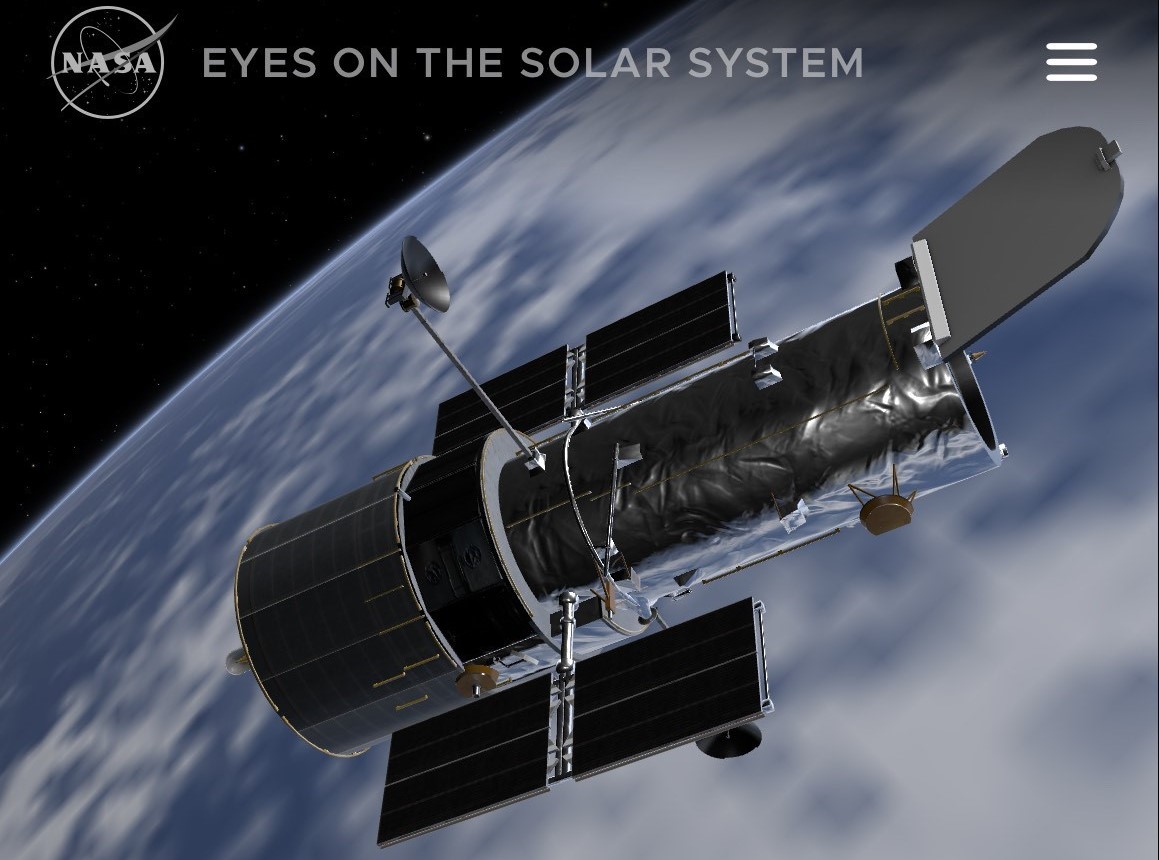
Hubble 3D Model Over Earth in NASA's "Eyes on the Solar System" Feature
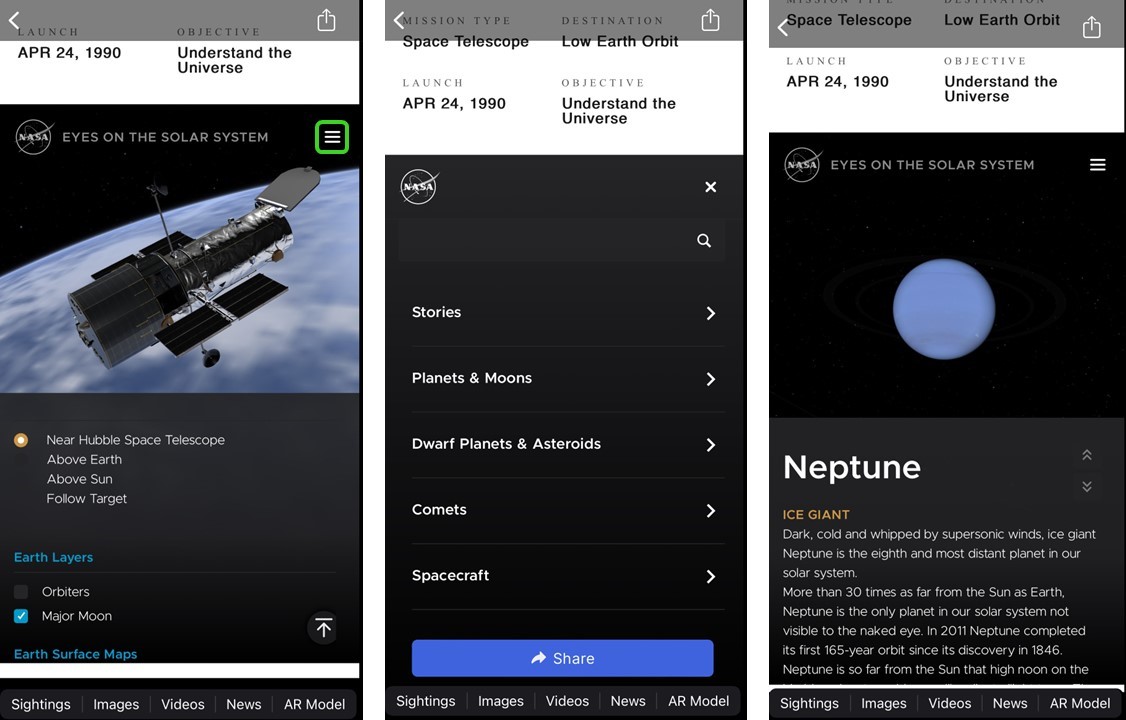
Hubble is featured in NASA's "Eyes on the Solar System" interactive, which shows where it is currently located in its orbit around the Earth. This feature also allows users to see and travel to other spacecraft and to other objects in the solar system (e.g. the planets). To use it, follow these steps:
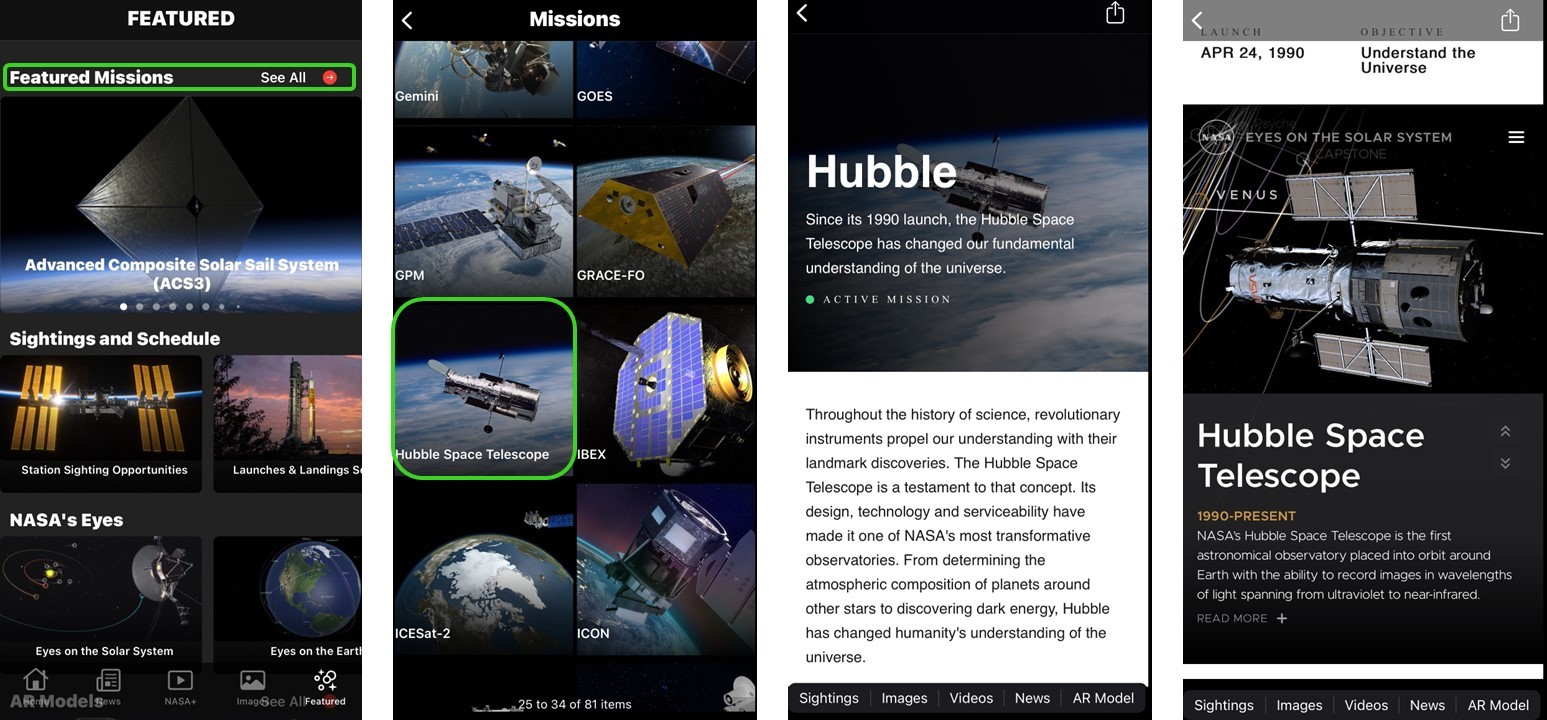
- Step 1: At the top of the "Featured" page, click the "See All" arrow next to "Featured Missions".
- Step 2: Scroll down to find "Hubble Space Telescope", and click on it.
- Step 3: This will bring you to the Hubble website homepage. Note: From the toolbar at the bottom of the page, you can access several other Hubble-related multimedia resources as well (see "Additional Multimedia Resources" below), including the AR feature described under Hubble Augmented Reality.
- Step 4: Scroll down to the bottom of the page to find NASA's "Eyes on the Solar System" application, and you'll see Hubble in the center of your field of view.
- How to Use: By dragging your finger over the "Eyes on the Solar System" window, you can move Hubble relative to the background and see the orbits of other objects in space behind it. To find settings to adjust what appears in the window, scroll down below Hubble's story. You can also read Hubble's story, and keep scrolling down (under the words "Read More") to find settings to adjust what you can see on the app.
- Additional Features: By clicking on the three lines in the top-right corner, you can virtually visit and learn more about numerous other solar system targets, and view news stories about famous solar system-related missions.
Additional Multimedia Resources
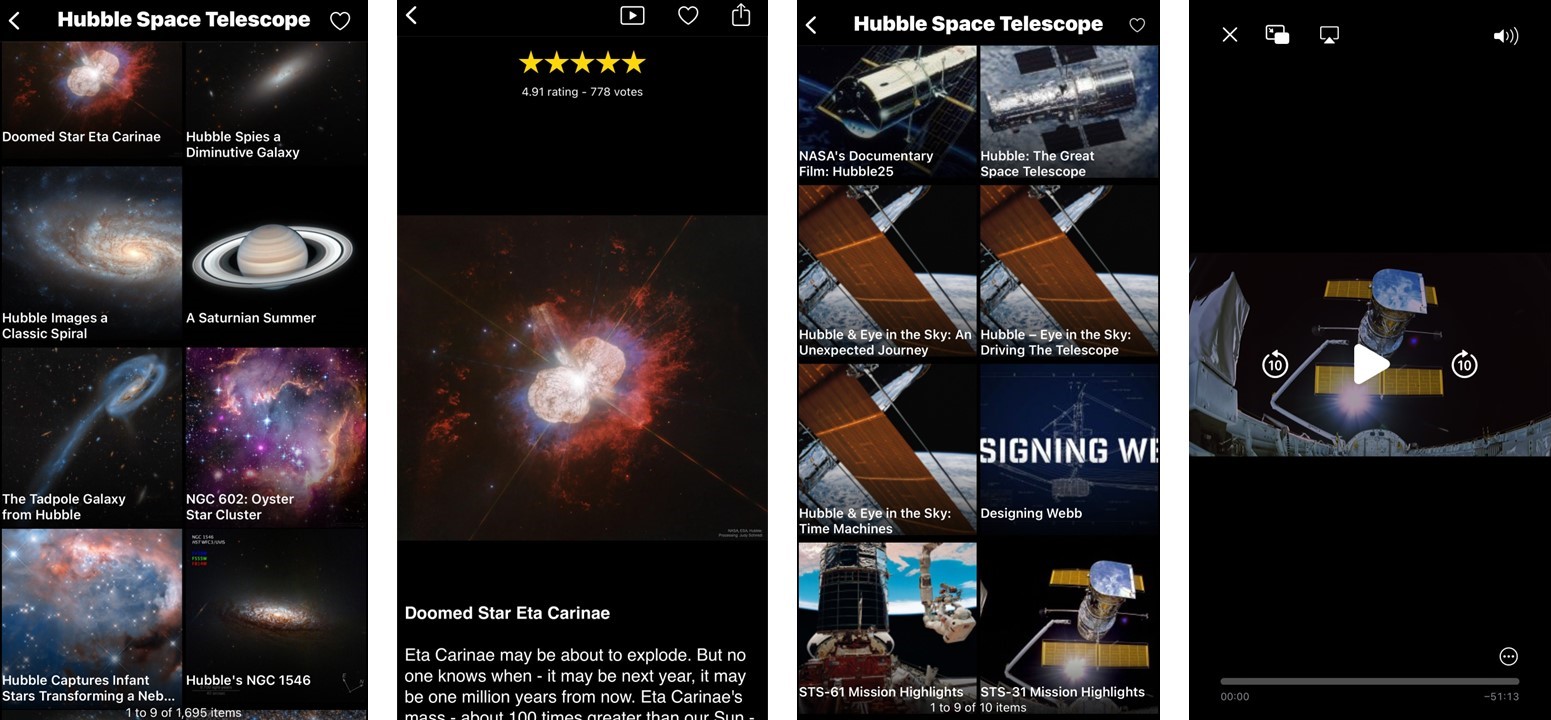
In addition to the interactive features listed above, many of Hubble's multimedia resources available on this website ― such as images and videos ― can be found on the NASA app as well. You can even determine when you can spot Hubble flying across the sky from your location (the Sightings option on the toolbar on Hubble's website homepage page). By following Steps 1-3 of the Hubble 3D Interactive Model section above, you can use the toolbar at the bottom of Hubble's main page to access your favorite Hubble resources on the go!

